
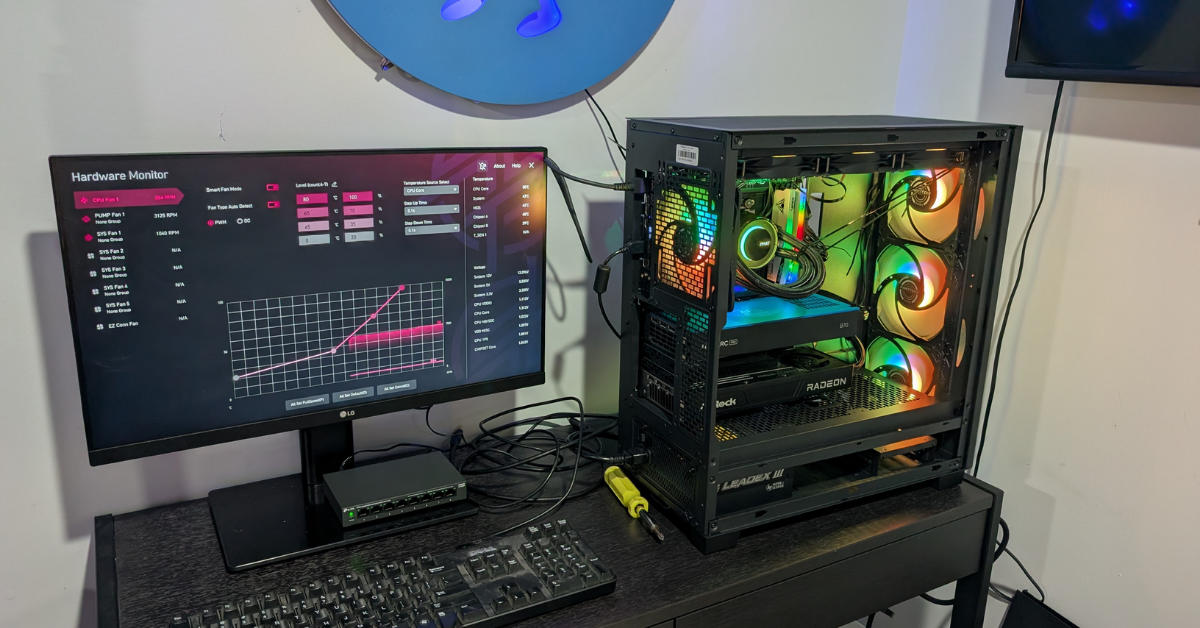
I’ve been building an AI PC for myself as part of the preparation for a series of courses on Pluralsight focusing on running Small Language Models. Local AI is an area that I’ve wanted to dig into for a while, and building a course for others is a great way to force myself to learn. It’s also a fantastic excuse to spend money on hardware - like I needed one.
This post is from my notes taken while standing up the assembled AI PC with Ubuntu 26.04 LTS. This is not necessarily the “best” way to do things, but I wanted to document the process in case I needed to rebuild. Maybe you’ll find it interesting too.
It would be helpful to explain what hardware I’m supporting in the AI PC. The motherboard is an MSI X870E WiFi mega extreme, something, something, something. Honestly, these names are obnoxious and I can’t even pretend to memorize them. It’s an AMD system board with a Ryzen 9 9900X CPU. I dropped in 64GB of RAM, which I may someday bump, but I doubt it. System RAM is not all that interesting for local AI workloads. The main job of the system RAM is to load the model weights and then copy them over to the GPU. As long as I can fit the weights, I’m good.
For the GPUs, I’ve got three, but I can only have two in at a time:
The system board has three PCIe5 slots, but the RTX 3090 is freakin’ huge. The AMD and Intel cards take up two slots on the back, while the 3090 takes up at least three. So I can have the 3090 in the top PCIe slot, and the Intel or AMD card in the bottom slot. Basically, the 3090 will stay where it is, and I will swap out the AMD and Intel cards depending on what I’m trying to test.
Due to the ever changing nature of my hardware, I wanted to minimize the amount of software installed on the box itself. Beyond the basic drivers for the GPUs and some essentials, I would rather run everything else in containers. Honestly, the software for local AI is changing so much every week that using container images is really the only way to go.
I started with the AMD and Intel GPUs installed, as I didn’t have the Nvidia card just yet. Base operating system is Ubuntu 26.04 LTS
The basic installation didn’t use the full drive. I ran this to fix it:
sudo lvextend -l +100%FREE /dev/ubuntu-vg/ubuntu-lv -r
After logging in, I updated the system:
sudo apt update
sudo apt upgrade
Now I need to verify that the correct device drivers are available for both cards. Intel uses the xe driver and AMD uses amdgpu.
lsmod | grep xe
xe                   4419584  2
drm_gpusvm_helper      57344  1 xe
intel_vsec             24576  1 xe
gpu_sched              69632  2 amdgpu,xe
drm_gpuvm              57344  1 xe
drm_buddy              28672  2 amdgpu,xe
drm_ttm_helper         20480  3 amdgpu,xe
ttm                   135168  3 amdgpu,drm_ttm_helper,xe
drm_exec               12288  3 drm_gpuvm,amdgpu,xe
drm_suballoc_helper    24576  2 amdgpu,xe
drm_display_helper    303104  2 amdgpu,xe
cec                   106496  3 drm_display_helper,amdgpu,xe
i2c_algo_bit           16384  2 amdgpu,xe
video                  77824  2 amdgpu,xe
lsmod | grep amdgpu
amdgpu              21569536  0
amdxcp                 12288  1 amdgpu
drm_panel_backlight_quirks    12288  1 amdgpu
gpu_sched              69632  2 amdgpu,xe
drm_buddy              28672  2 amdgpu,xe
drm_ttm_helper         20480  3 amdgpu,xe
ttm                   135168  3 amdgpu,drm_ttm_helper,xe
drm_exec               12288  3 drm_gpuvm,amdgpu,xe
drm_suballoc_helper    24576  2 amdgpu,xe
drm_display_helper    303104  2 amdgpu,xe
cec                   106496  3 drm_display_helper,amdgpu,xe
i2c_algo_bit           16384  2 amdgpu,xe
video                  77824  2 amdgpu,xe
lspci | grep VGA
03:00.0 VGA compatible controller: Intel Corporation Battlemage G31 [Intel Graphics]
08:00.0 VGA compatible controller: Advanced Micro Devices, Inc. [AMD/ATI] Navi 48 [Radeon AI PRO R9700] (rev c0)
78:00.0 VGA compatible controller: Advanced Micro Devices, Inc. [AMD/ATI] Granite Ridge [Radeon Graphics] (rev c2)
Looks good. The Intel Arc is the Battlemage G31 card and the Navi 48 is the Radeon Pro 9700. Don’t you love it hardware has like six different names depending on which tool you use? Don’t worry, it gets more fun!
I can grab more info with lshw:
sudo lshw -C video
  *-display
       description: VGA compatible controller
       product: Battlemage G31 [Intel Graphics]
       vendor: Intel Corporation
       physical id: 0
       bus info: pci@0000:03:00.0
       version: 00
       width: 64 bits
       clock: 33MHz
       capabilities: pciexpress msi pm vga_controller bus_master cap_list rom
       configuration: driver=xe latency=0
       resources: iomemory:280-27f iomemory:180-17f irq:169 memory:2800000000-2800ffffff memory:1800000000-1fffffffff memory:dda00000-ddbfffff memory:2801000000-2804ffffff memory:2000000000-27ffffffff
  *-display
       description: VGA compatible controller
       product: Navi 48 [Radeon AI PRO R9700]
       vendor: Advanced Micro Devices, Inc. [AMD/ATI]
       physical id: 0
       bus info: pci@0000:08:00.0
       version: c0
       width: 64 bits
       clock: 33MHz
       capabilities: pm pciexpress msi vga_controller bus_master cap_list rom
       configuration: driver=amdgpu latency=0
       resources: iomemory:e00-dff iomemory:e80-e7f irq:172 memory:e000000000-e7ffffffff memory:e800000000-e80fffffff ioport:f000(size=256) memory:dde00000-dde7ffff memory:dde80000-dde9ffff
  *-display
       description: VGA compatible controller
       product: Granite Ridge [Radeon Graphics]
       vendor: Advanced Micro Devices, Inc. [AMD/ATI]
       physical id: 0
       bus info: pci@0000:78:00.0
       logical name: /dev/fb0
       version: c2
       width: 64 bits
       clock: 33MHz
       capabilities: pm pciexpress msi msix vga_controller bus_master cap_list fb
       configuration: depth=32 driver=amdgpu latency=0 mode=1920x1080 resolution=1920,1080 visual=truecolor xres=1920 yres=1080
       resources: iomemory:f80-f7f irq:82 memory:f810000000-f81fffffff memory:dd400000-dd5fffff ioport:e000(size=256) memory:dd900000-dd97ffff
Awesome. So both cards are there and the correct drivers are loaded. Which version of the drivers am I using? Good question! Let’s collect more about the system and drivers.
Linux ai-pc 7.0.0-28-generic
To get kernel drivers I can use lspci -k -s <domain:bus:slot>
Here’s what I get for the two cards:
03:00.0 VGA compatible controller: Intel Corporation Battlemage G31 [Intel Graphics]
        Subsystem: Intel Corporation Device 1701
        Kernel driver in use: xe
        Kernel modules: xe

08:00.0 VGA compatible controller: Advanced Micro Devices, Inc. [AMD/ATI] Navi 48 [Radeon AI PRO R9700] (rev c0)
        Subsystem: ASRock Incorporation Device 5413
        Kernel driver in use: amdgpu
        Kernel modules: amdgpu
Still doesn’t tell me version.
modinfo xe | grep version will tell me, but it just matches the Linux kernel version, so if I want to upgrade the drivers, I probably need to update my Linux kernel.
Device paths can be found by running ls against the path /dev/dri/by-path. The symlink will show which card maps to which render device.
I think that should stay pretty consistent.
Next, I need to install the software I plan to use to run the GPUs. Here’s a short list of items:
There are a few other pieces of software I ended up installing, but these were the big ones. Like I said, the goal is to minimize what’s installed locally and leverage containers for things like uv, python, GPU software, llama.cpp, and vLLM.
I chose to use podman b/c I hate myself and want everything to be more difficult. It’s the same reason I bought an Intel GPU!
To run containers and pass the GPU device, my user needs to be a member of render and video:
sudo usermod -aG render,video $USER
I needed to log out and back in for this to take effect.
I am going to try and use podman where possible. Here’s what I’ve discovered. When running podman, I have to include the switch --group-add keep-groups. Essentially that grants the container the same group access as me. I could probably be more explicit and use the render and video groups.
podman run --rm -it --group-add keep-groups --device /dev/dri/renderD128 docker.io/intel/oneapi-basekit:latest bash
Trying with llama.cpp
podman run --rm -it --group-add keep-groups --device /dev/dri/renderD128 ghcr.io/ggml-org/llama.cpp:full-intel bash
I’m going to try running Qwen3.5-9B-Q4_K_M. First I will download it to a new directory called models:
mkdir models
cd models
wget https://huggingface.co/unsloth/Qwen3.5-9B-GGUF/resolve/main/Qwen3.5-9B-Q4_K_M.gguf
Next I can launch a container to run the model:
podman run --rm -it \
  --group-add keep-groups \
  --device /dev/dri/renderD128 \
  -v /home/ned/models:/models \
  ghcr.io/ggml-org/llama.cpp:full-intel \
  --run -m /models/Qwen3.5-9B-Q4_K_M.gguf
That worked well for interactive chats. What about benchmarking and perplexity? The “full” container image uses llama-cli as it’s entry point, so anything after the docker image name will be passed as arguments to llama-cli.
You can run a benchmark by using --bench -m <model_file>
For example, the Qwen3.5-9B-Q4_K_M ran at 2616t/s for pp512 and 71t/s for tg128.
It can also quantize models for us. I am pulling down the Qwen3.5-9B-BF16.gguf model and will quantize it.
--quantize "/models/Qwen3.5-9B-BF16.gguf" "/models/Qwen3.5-9B-Q8_0.gguf" Q8_0
The quantize time was ~7 seconds!
Checking out the various sizes:
ls -lh /users/ned/models
-rw-rw-r-- 1 ned ned  18G Jul 22 15:12 Qwen3.5-9B-BF16.gguf
-rw-rw-r-- 1 ned ned 5.3G Jul 22 14:02 Qwen3.5-9B-Q4_K_M.gguf
-rw-r--r-- 1 ned ned 9.2G Jul 22 15:21 Qwen3.5-9B-Q8_0.gguf
What if we want to use the AMD card? The image is ghcr.io/ggml-org/llama.cpp:full-rocm
podman run --rm -it \
  --group-add keep-groups \
  --device /dev/dri \
  --device /dev/kfd \
  -v /home/ned/models:/models \
  ghcr.io/ggml-org/llama.cpp:full-rocm \
  --run -m /models/Qwen3.5-9B-Q4_K_M.gguf
Note that /dev/dri and /dev/kfd both have to be included, and it doesn’t work if you just pass the specific device /dev/dri/renderD129. Why? Not sure.
I’d like to try out the Granite model from IBM:
ibm-granite/granite-4.1-30b-GGUF:Q4_K_M
podman run --rm -it \
  --group-add keep-groups \
  --device /dev/dri \
  --device /dev/kfd \
  -v /home/ned/models:/models \
  ghcr.io/ggml-org/llama.cpp:full-rocm \
  --run -m /models/granite-4.1-30b-Q4_K_M.gguf
After running the benchmark for the Granite model on both cards, here’s the results:
| model                          |       size |     params | backend    | ngl |            test |                  t/s |
| ------------------------------ | ---------: | ---------: | ---------- | --: | --------------: | -------------------: |
| granite ?B Q4_K - Medium       |  16.29 GiB |    28.87 B | SYCL       |  -1 |           pp512 |        986.08 ± 2.30 |
| granite ?B Q4_K - Medium       |  16.29 GiB |    28.87 B | SYCL       |  -1 |           tg128 |         26.03 ± 0.02 |
| granite ?B Q4_K - Medium       |  16.29 GiB |    28.87 B | ROCm       |  -1 |           pp512 |       1053.69 ± 6.92 |
| granite ?B Q4_K - Medium       |  16.29 GiB |    28.87 B | ROCm       |  -1 |           tg128 |         29.75 ± 0.03 |
The AMD card is slightly faster, but it also uses more power. The Intel card uses ~230W and the Radeon pulls 300W.
What’s interesting is that the benchmark only takes up 16.29GB of VRAM, but when I load the model for chat, it takes up 30GB. Is that a consequence of no context being set for the benchmark testing?
I should try setting an explicit context and some other arguments to see if it changes how the model runs.
podman run --rm -it \
  --group-add keep-groups \
  --device /dev/dri \
  --device /dev/kfd \
  -v /home/ned/models:/models \
  ghcr.io/ggml-org/llama.cpp:full-rocm \
  --run -m /models/granite-4.1-30b-Q4_K_M.gguf \
  -c 4096
That did it. The VRAM usage dropped way down when loading the model, so it must be something about the defaults.
Granite requests a context window of 131,072 tokens. I’m not sure which file that is stored in, but when you load the model with verbosity set to level four, this line shows you the value:
0.00.416.815 I llama_model_loader: - kv 7: granite.context_length u32 = 131072
llama.cpp tries to set the context window to the what the model requests without going beyond the available VRAM on the card. For example, if I don’t specify a context value for Granite, then the model itself takes up 16.7GB of VRAM. That leaves about 15.3GB of VRAM for the context window plus headroom.
The calculation for the KV cache has to do with the number of layer in the model, the number of KV heads, and the head dimensionality.
First you need to know how many values are stored per context token. That is a function of the attention layer.
Values per token = 2 x layers x heads x head-dimension
For the Granite 4.1 model, there are 131,072 values per token. If we are using FP16, then that is 2-bytes per value, giving a total of 262,144 bytes or 0.25MB per token.
So if the context is set to 65k, that will take up ~16GB of space in VRAM. The requested 131k tokens would take up almost 32GB!
Basically llama.cpp looks at how much VRAM is left over and divides by the storage per token, with a goal of leaving 1GB of head space.
14,400/0.25 = 57,600 context window.
If you want to reduce the space used by the context window, you can apply quantization to the storage of K and V. -ctk q8_0 and -ctv q8_0 will use 8-bit quantization to store the values. That should drop the amount of storage by 50%.
Even at that level of quantization, we still can’t quite reach the 131K context, and instead have to settle for 106K. If I use q4_0 then the whole model and context can fit in about 26GB. Which is great, but 4-bit quantization might mess up the accuracy of the model too badly. More testing would be required.
Oh, and the benchmark runs? They only use 512 tokens for the context window, so that’s why the memory usage is only 16GB. It’s basically just the model.
Those are the notes from my first attempt with the AI PC. I’ve built out a system with minimal software, which will make it easy to manage and rebuild going forward. All of the quickly changing components, like llama.cpp and PyTorch packages, live in the container images.
My next adventure is trying out Unsloth Studio and hosting Jupyter notebooks. Catch you then!
October 5, 2026

August 29, 2026

May 23, 2026

